Configuring MX Records for Google Workspace on Bluehost is a straightforward process that ensures your professional email address is linked seamlessly with your domain.
This setup allows you to use Google Workspace's robust email services without the need for separate email hosting, saving you both time and money.
Below is a detailed guide to help you through this process.
Introduction
Creating a professional email address with your company’s domain is a vital aspect of establishing a business website. While hosting providers often offer separate email hosting services, a little-known trick is that you can configure your web server to handle your email as well. This is where MX Records come into play.
Understanding MX Records
MX Records, or Mail Exchange Records, are DNS records that direct emails to a mail server. These records are essential for determining where emails sent to your domain should go. They play a crucial role in ensuring that your emails reach their destination without any issues.
The Process of Setting Up MX Records on Bluehost for Google Workspace
1. Obtain New MX Records from Google Workspace
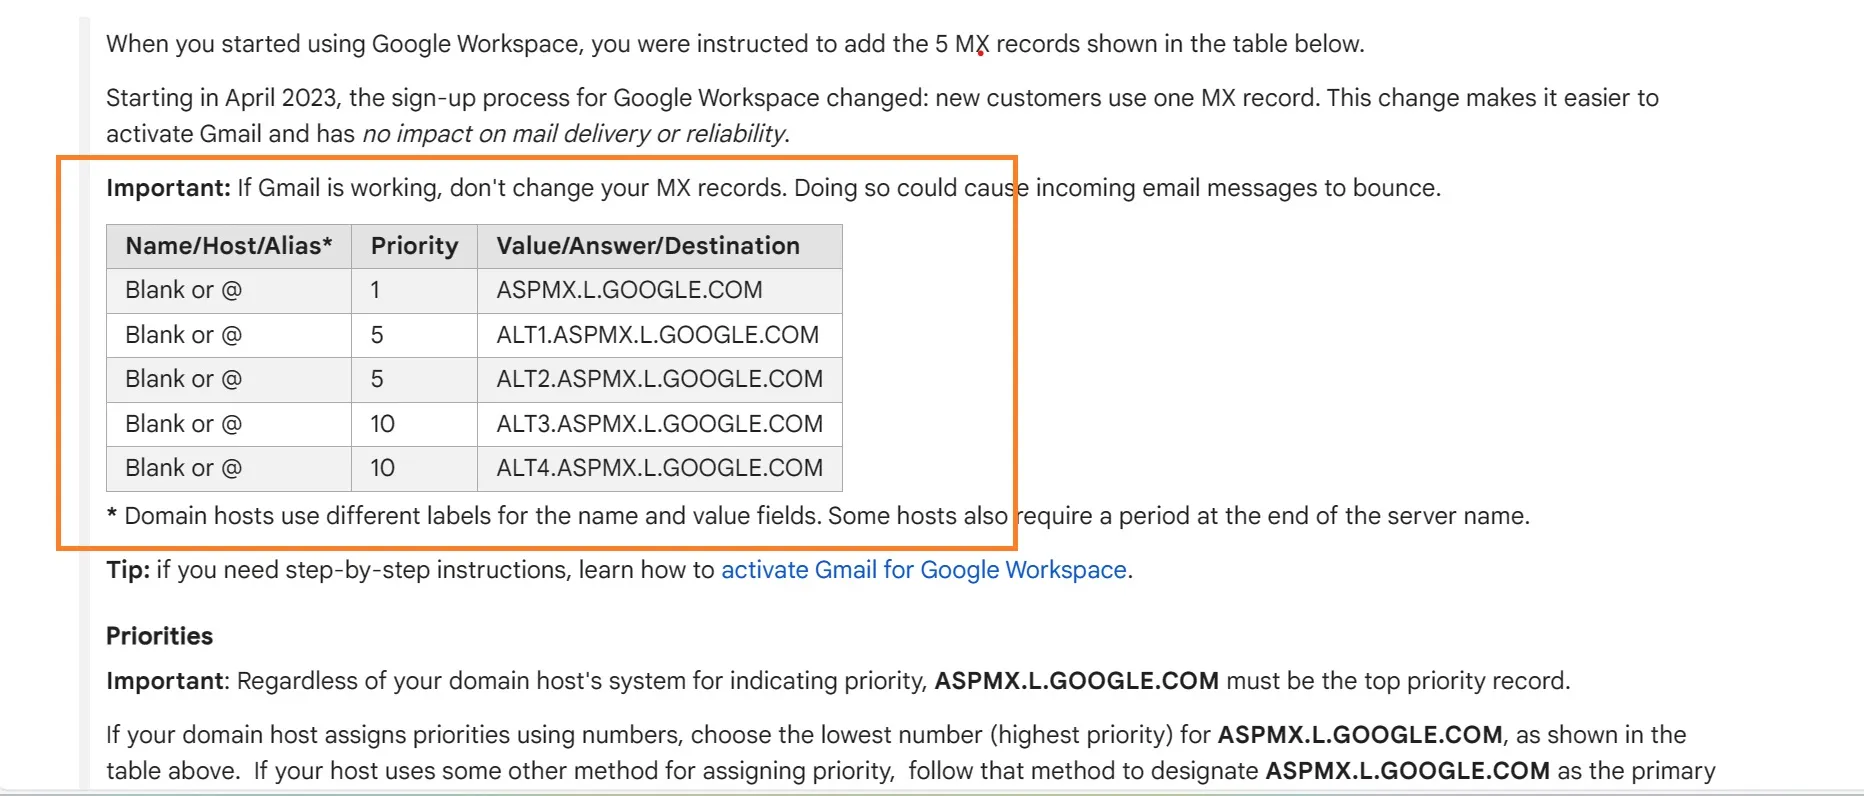
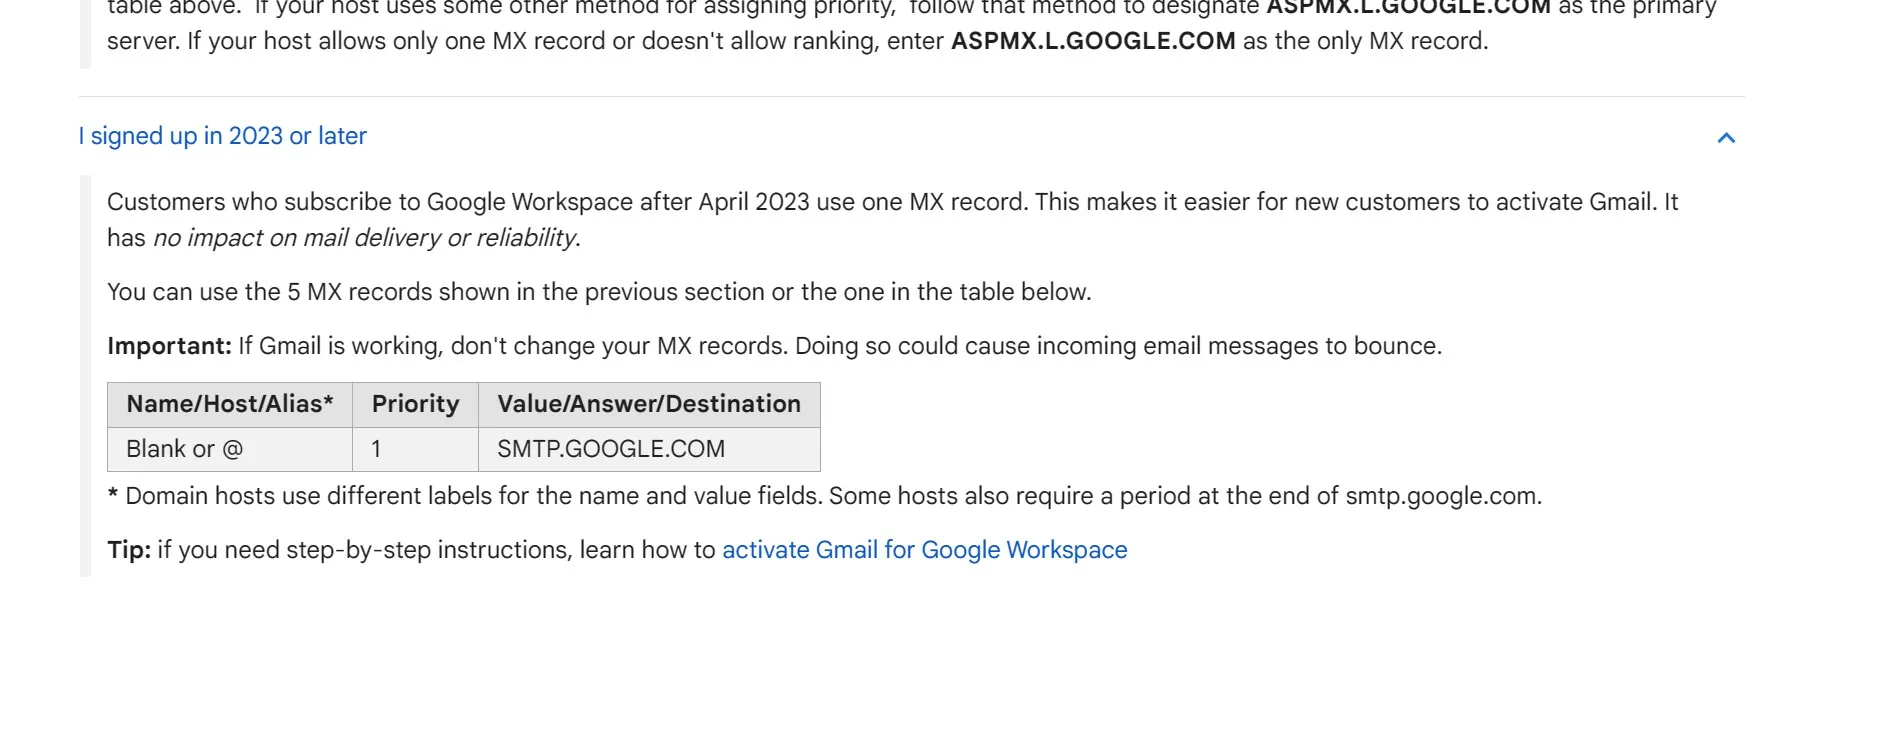
When you choose Google Workspace as your email service provider, the first step is to acquire the necessary MX Records from Google Workspace. These records are specific to Google and are critical for directing your emails to Google's servers.
You will get all the details here : Google Workspace Help
2. Delete Existing MX Records in Bluehost
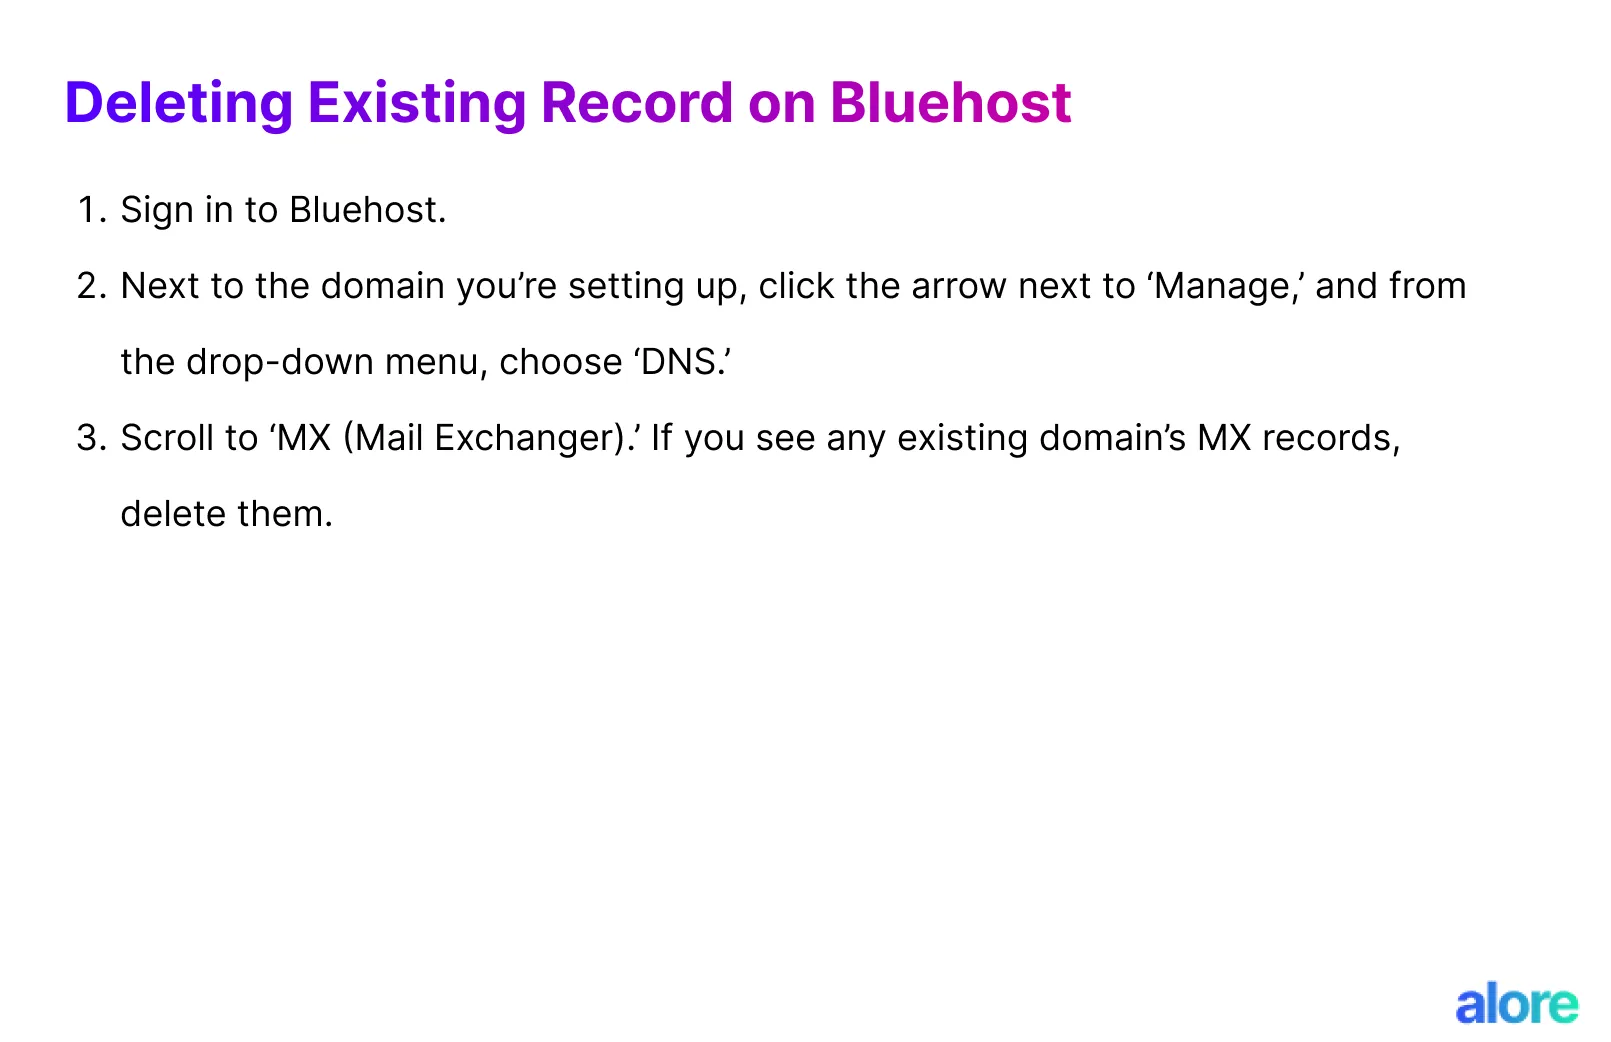
Log in to your Bluehost account and navigate to the DNS settings for your domain. Here, you will need to delete any existing MX Records that are routing messages to a different email provider. This step is crucial to prevent any conflicts or misrouting of your emails.
3. Adding Google Workspace MX Records to Bluehost
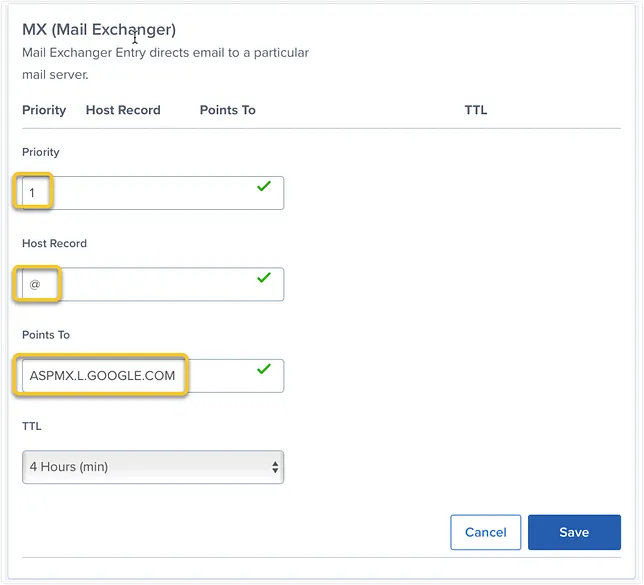
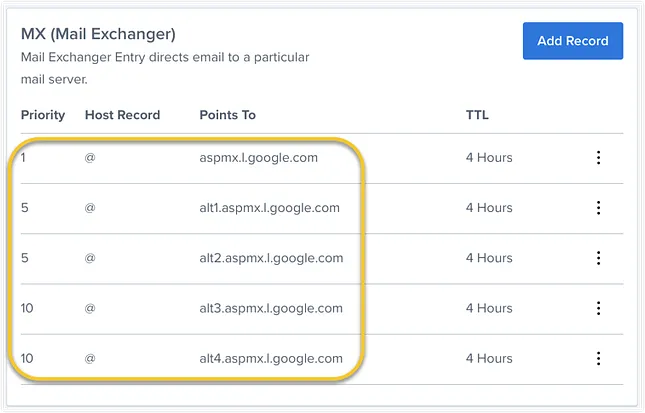
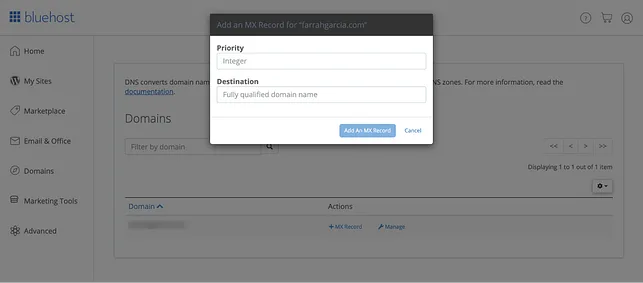
After clearing the old MX Records, you can start adding the new ones from Google Workspace. In Bluehost's DNS settings, add each of the Google MX Records. Remember to fill in the 'Priority' and 'Host Record' fields as specified by Google. The TTL (Time to Live) value is also important, as it dictates how often DNS records are updated.
4. Verify the Changes in Google Workspace
Once you've added all the MX Records, return to the Google Workspace setup tool and complete the verification process. This step is essential to activate Gmail for your domain. Keep in mind that DNS changes can take up to 48 hours to propagate fully, so there might be a delay before your new setup is fully functional.
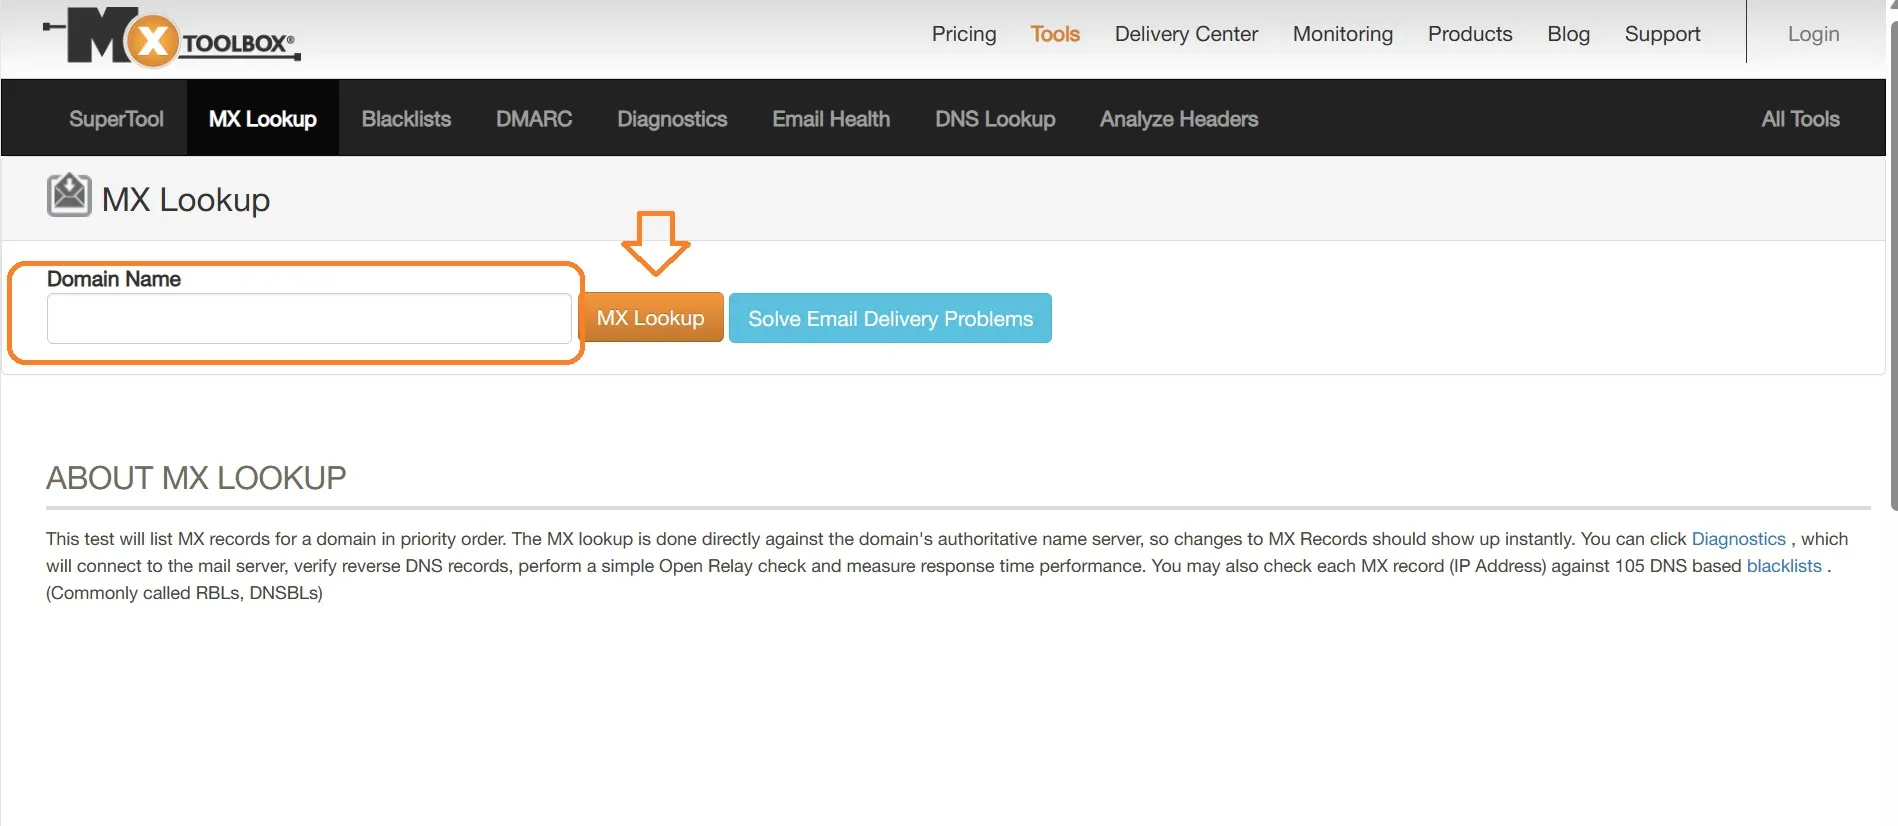
Alternatively you can go to MX Lookup Tool - Check your DNS MX Records online - MxToolbox

5. Setting Up MX Records through Bluehost’s cPanel
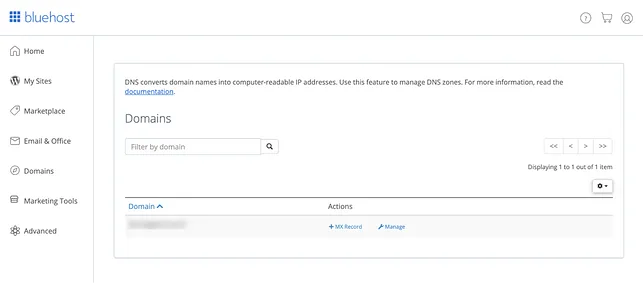
If you prefer to use Bluehost's cPanel for managing your domain's DNS settings, you can also set up MX Records here. Locate the Zone Editor in your cPanel, select your domain, and use the '+MX Record' option to add the new MX Records as recommended by Google Workspace.
Final Thoughts
Setting up MX Records from Bluehost to Google Workspace not only streamlines your email services but also allows you to have a more integrated and efficient web and email hosting solution. By following these steps, you can ensure that your business communications are routed correctly, enhancing the professionalism and efficiency of your email interactions.
Remember, while the process is straightforward, it requires attention to detail to ensure that all records are entered correctly. Once completed, this setup will allow you to leverage the full suite of tools and services offered by Google Workspace, paired with the reliability of your Bluehost domain.


.png)

