What is an SPF Record
An SPF (Sender Policy Framework) record is a kind of Domain Name System (DNS) record that specifies which email servers are authorized to send emails to your domain.
This record aims to stop spammers from sending emails with fake From addresses using your domain.
In the context of GoDaddy SPF records, think of it as a gatekeeper, ensuring only authorized mail servers send emails on your behalf. This is crucial for maintaining your brand's credibility and your recipients' trust.
What is Domain Name System
The Domain Name System (DNS) is a fundamental Internet component, functioning as a directory service that translates human-friendly domain names into the numerical IP addresses needed for locating and identifying computer services and devices with the underlying network protocols.
What are Other Email Authentication Methods
DomainKeys Identified Mail (DKIM) Record, Domain-based Message Authentication, Reporting, and Conformance (DMARC) Record are email authentication methods that work with SPF Records in tandem to improve email security and trustworthiness.
DKIM complements SPF by providing an extra security layer, using a digital signature to verify email content and ensure it hasn't been altered in transit, thus maintaining content integrity even after SPF validation.
DMARC consolidates SPF and DKIM outcomes, verifying their compliance with the domain's DMARC policy and directing servers on handling failures (e.g., rejection, spam marking) while offering domain owners feedback on their email traffic.
How Does SPF Record Work

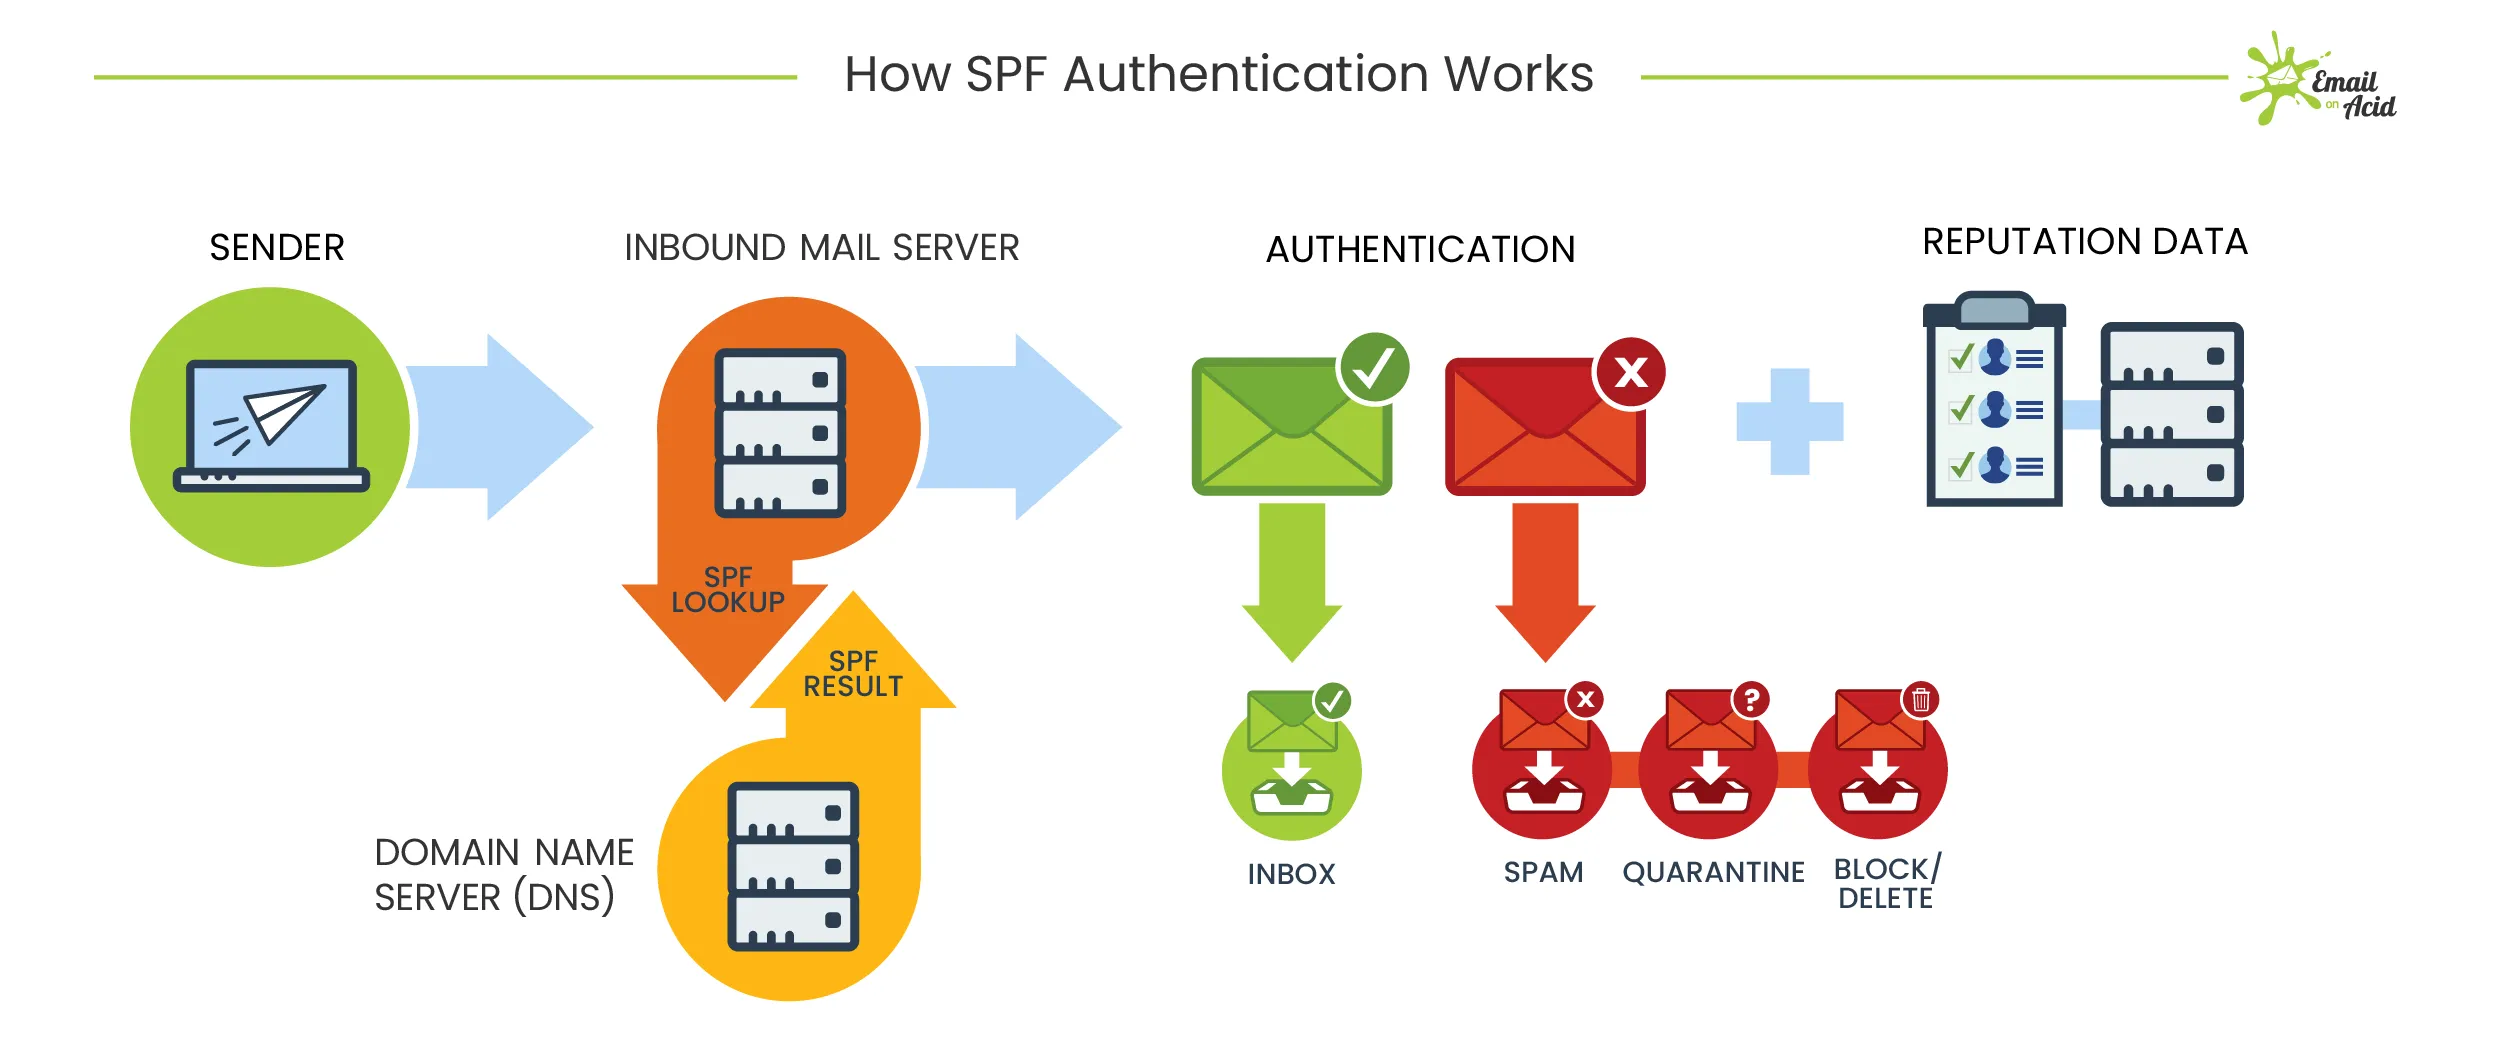
An SPF (Sender Policy Framework) record is added to a domain's DNS records, specifically in the TXT records section, to specify which mail servers are authorized to send email on behalf of your email domain.
This is crucial for preventing email spoofing, where spammers send emails with forged "From" addresses from your domain. Here's how it works:
1. Adding an SPF Record
The domain owner decides to add an SPF record to their domain's DNS. This is done in the records section of their DNS management interface, typically where they manage other DNS entries like DKIM records. The SPF record is published as a type of TXT record.
2. Publishing the SPF Record
The specific TXT value of the SPF record lists the IP addresses or hostnames of the servers authorized by the email service provider to send emails for the domain.
3. Email is Sent
When a server sends an email on behalf of your domain, the email travels through the internet to the recipient's email server.
4. SPF Check by Recipient's Server
The recipient's mail server looks up the SPF TXT record for the sender's domain.
It checks if the IP address of the mail server that sent the email is listed in the SPF TXT record.
5. Verification Outcome
Pass: If the sending server’s IP address matches an IP address in the SPF record, the email passes the SPF check, indicating it was sent from an authorized server.
Fail: If there's no match, the email fails the SPF check. The recipient's server then decides based on its policy whether to reject, flag, or otherwise process the email.
6. Reporting and Monitoring
The results of the SPF check can be reported back to the sender’s domain, especially if they use DMARC for monitoring their email-sending practices.
By adding an SPF record to the TXT records section of their DNS settings, domain owners can significantly enhance the security and reliability of emails sent from their domain.
How to Setup an SPF Record in GoDaddy
Setting up an SPF (Sender Policy Framework) record in GoDaddy is a straightforward process. Here's a step-by-step guide to help you do it:
1. Log in to your GoDaddy Account
Access your GoDaddy account by entering your username and password.
2. Access the Domain Management Page

Once logged in, go to your product page or the dashboard. Find the domain you want to manage and select it.
3. Navigate to DNS Management
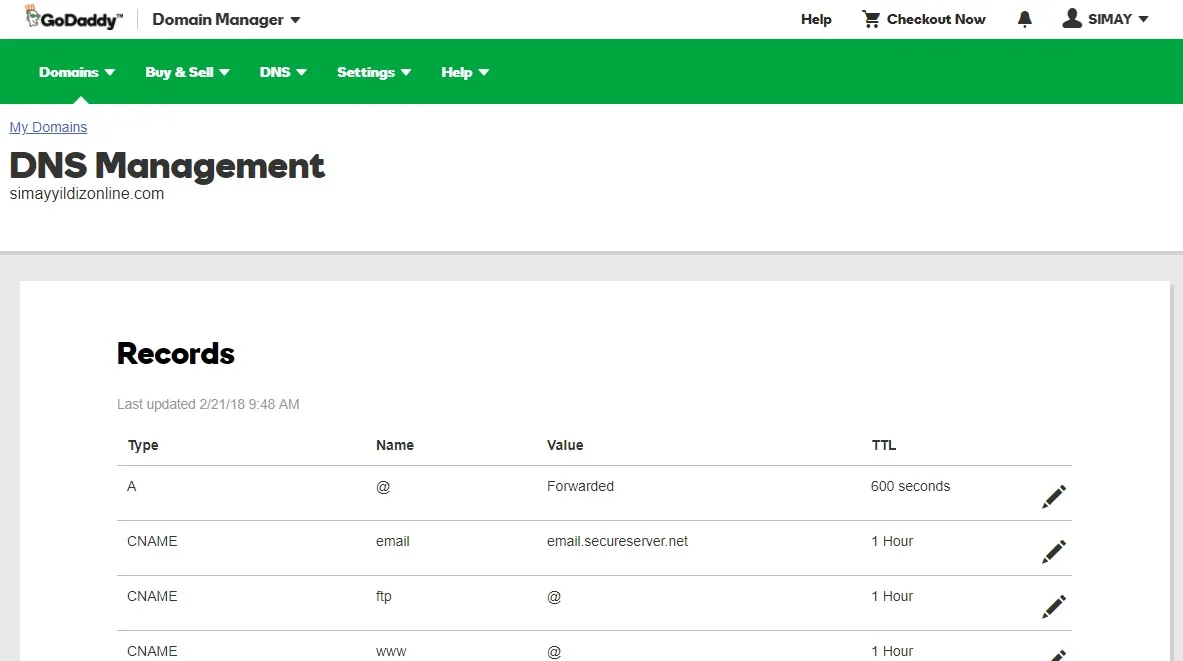
Locate the DNS or Domain settings and select manage DNS. GoDaddy typically lists this under the domain management area.
4. Edit DNS Records

Within the DNS Management page, you'll see a list of your existing DNS records.
5. Locate TXT Records
Look for an existing SPF record under the TXT (Text) section. An SPF record starts with "v=spf1". If you already have an SPF record, you might need to modify it instead of creating a new one to avoid conflicts.
6. Add or Edit the SPF Record
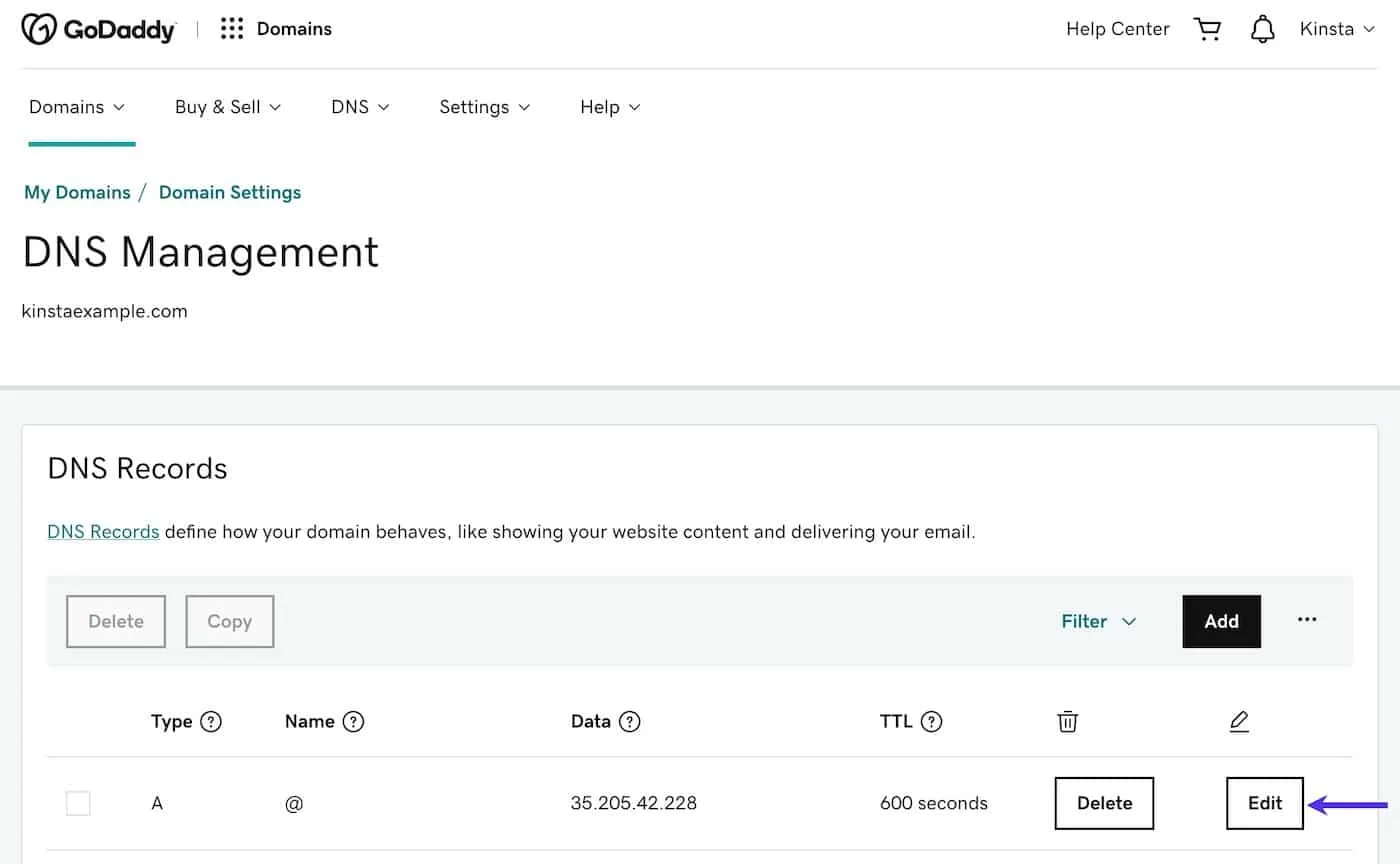
If there's no SPF record: Click on “Add” for a new txt record and select “TXT” from the dropdown menu to add spf record
If there's an existing SPF record: Click the pencil icon or “Edit” next to the record.
7. Enter SPF Record Details

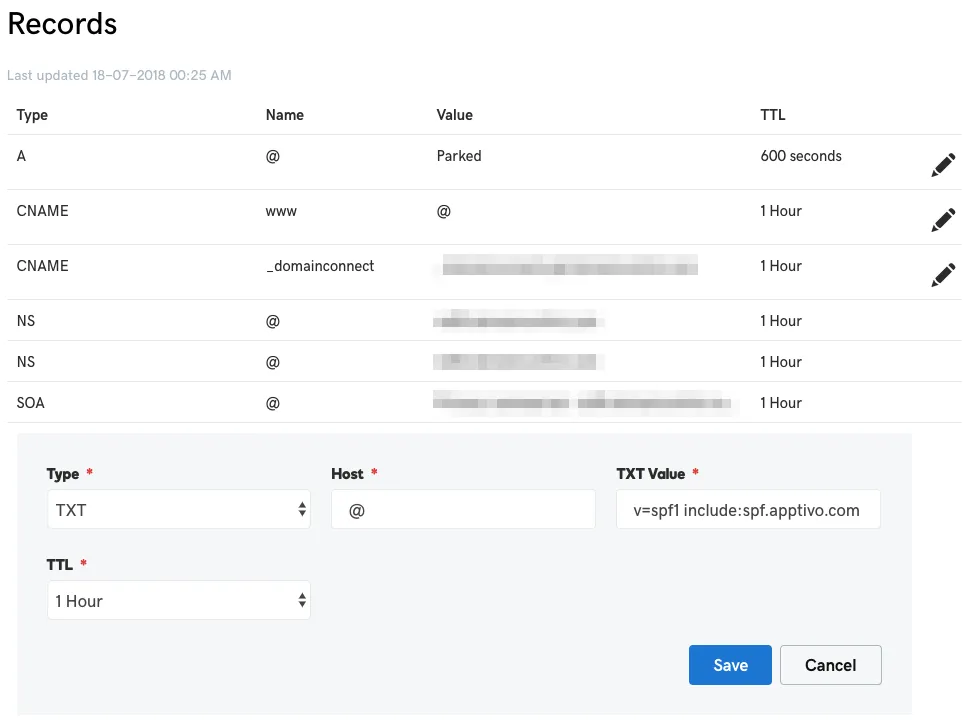
Enter this Details in your record entry
- Type: Select "TXT".
- Host: Usually "@", which represents your domain.
- TXT Value: Enter the SPF record value. For example, "v=spf1 include:_spf.google.com ~all" (if you're using Google Workspace). This syntax specifies which mail servers are allowed to send email on behalf of your domain.
- TTL (Time to Live): Set the TTL, which is how long the server should cache information. The default is usually fine.
8. Save the Record
Click “Save” to implement the new SPF record. Changes to DNS may require up to 48 hours to spread worldwide, though they frequently occur much faster.
9. Verify the SPF Record
After the record has propagated, use an online SPF record checker to confirm that it's correctly configured and verify that it shows txt record published.


.jpg)

.jpg)
