Setting up MX Records for your Google Workspace on GoDaddy is a crucial step in ensuring that your emails are properly routed to your Google Workspace mailboxes. This process involves a few specific steps that need to be followed accurately. Here's a comprehensive guide to help you through the process.
Introduction
When you create a Google Workspace account, one of the first tasks is to set up your email services. This enables all users in your account to start receiving emails. The key to this setup is configuring MX Records, which are essential for directing your emails to the correct servers.
Understanding MX Records
MX Records, or Mail Exchange Records, are DNS (Domain Name System) records that specify which mail servers are responsible for receiving email on behalf of your domain. These records prioritize mail servers, ensuring that if one server is down, another can take over, preventing email bounce-backs.
If you want to know more about MX Record and its importance, please read our artcile Mastering MX Records: Configure, Analyze, and Troubleshoot for Optimal Email Flow | Alore
Step-by-Step Guide
1. Accessing GoDaddy DNS Management
First, log into your GoDaddy account. Navigate to "My Products," find "Domain Names," and click on "DNS." This will bring you to the DNS Management page.
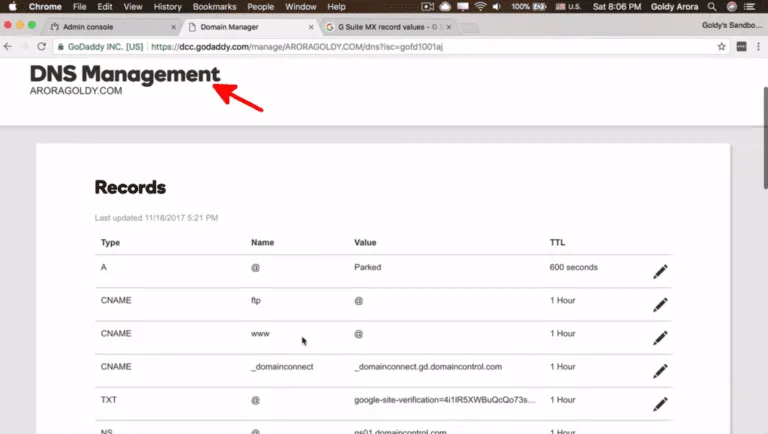
2. Locating Google Workspace MX Records
Search for "Google Workspace MX Records" using a search engine. The first non-ad result usually has the information you need. You'll find a list of five MX Records values. Note these down for the next steps.
You will get all the details here : Google Workspace Help
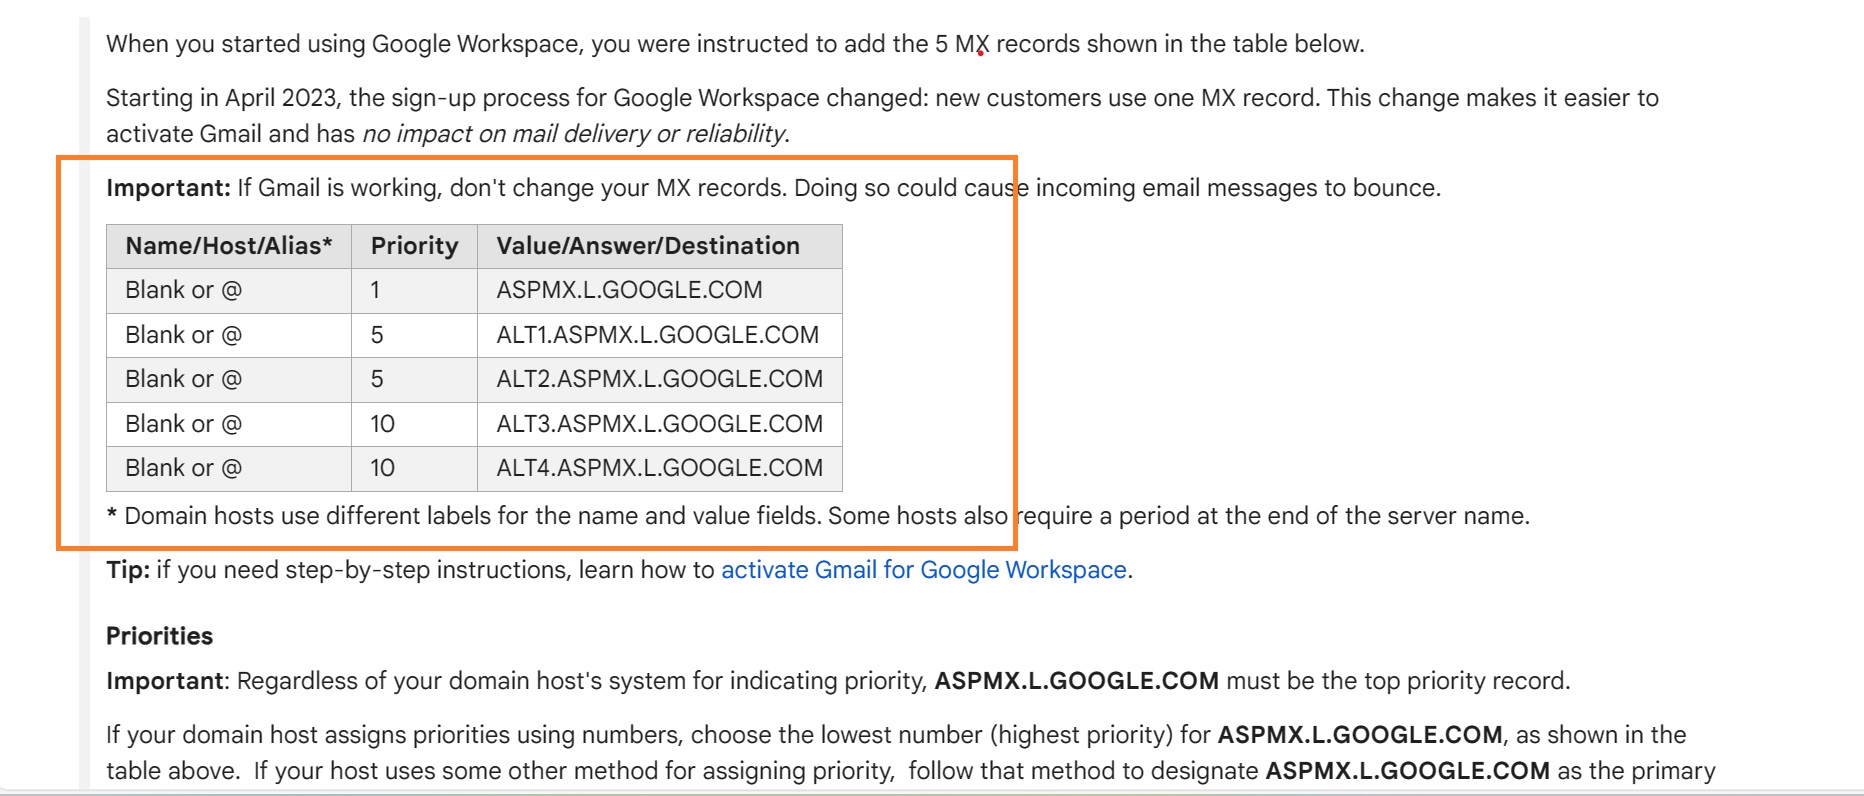
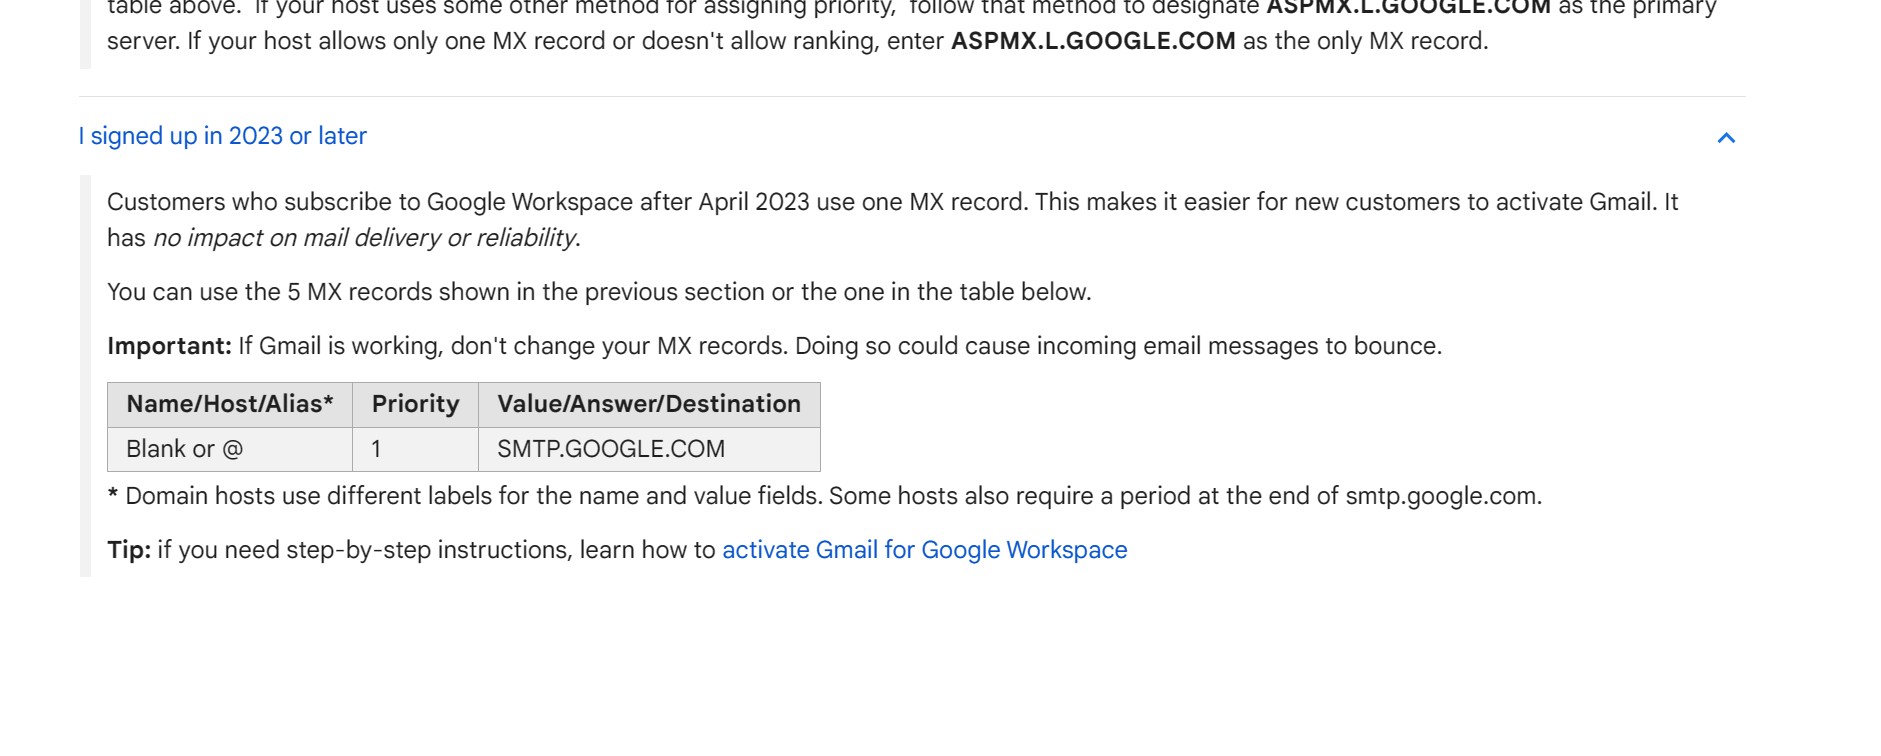
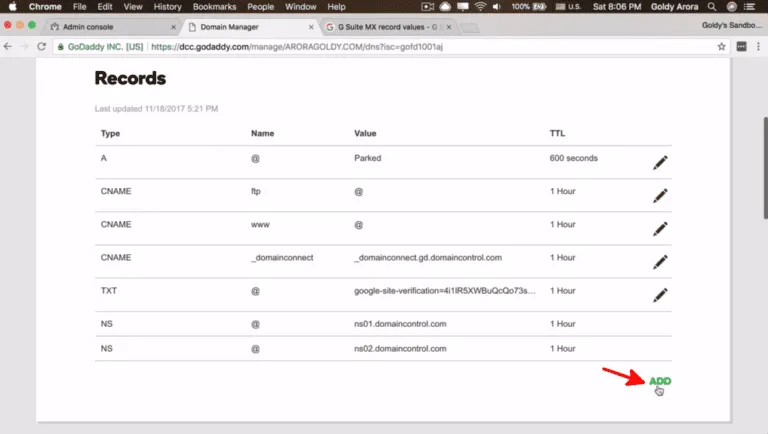
3. Adding MX Records in GoDaddy
In GoDaddy's DNS Management, look for the "ADD" button to add a new MX Record. This is where you will begin entering the Google Workspace MX Record information.
4. Inputting MX Record Details
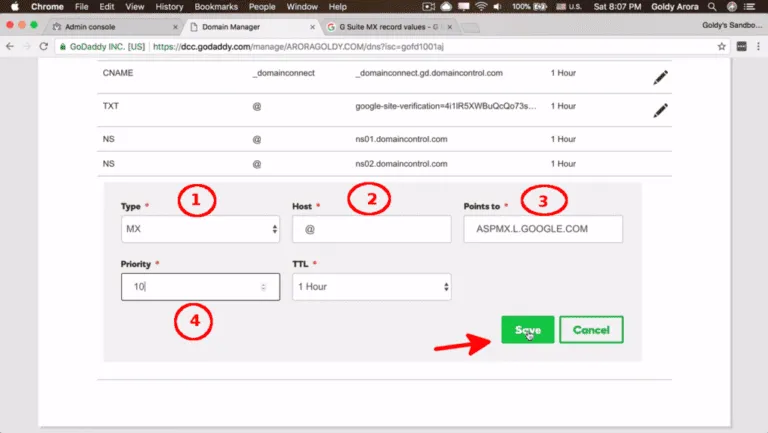
Select "MX" as the record type. In the next field, type the "@" symbol. Copy the first Google Workspace email server value and paste it into the relevant field. Set the priority (10, 20, 30, etc.) as per the Google Workspace instructions and save the record.
5. Completing the MX Records Setup
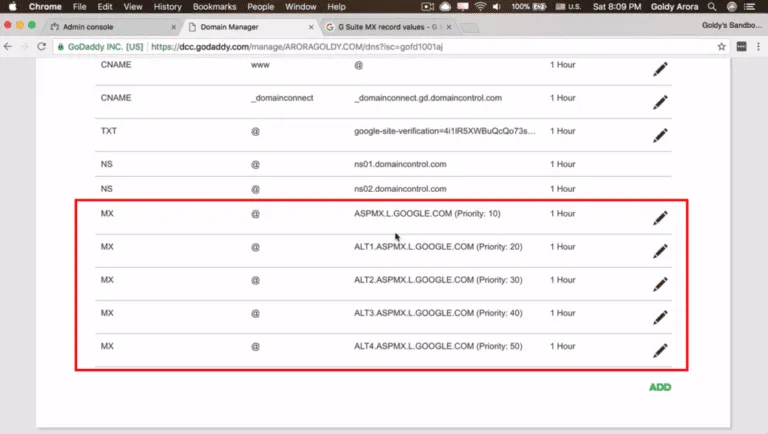
Repeat steps 3 and 4 to add the remaining MX records from Google Workspace, ensuring to maintain the sequence of priority for each. Once all five records are added, your domain's DNS Management page should display a complete list of MX Records.
Verifying the Setup
Performing an MX Lookup
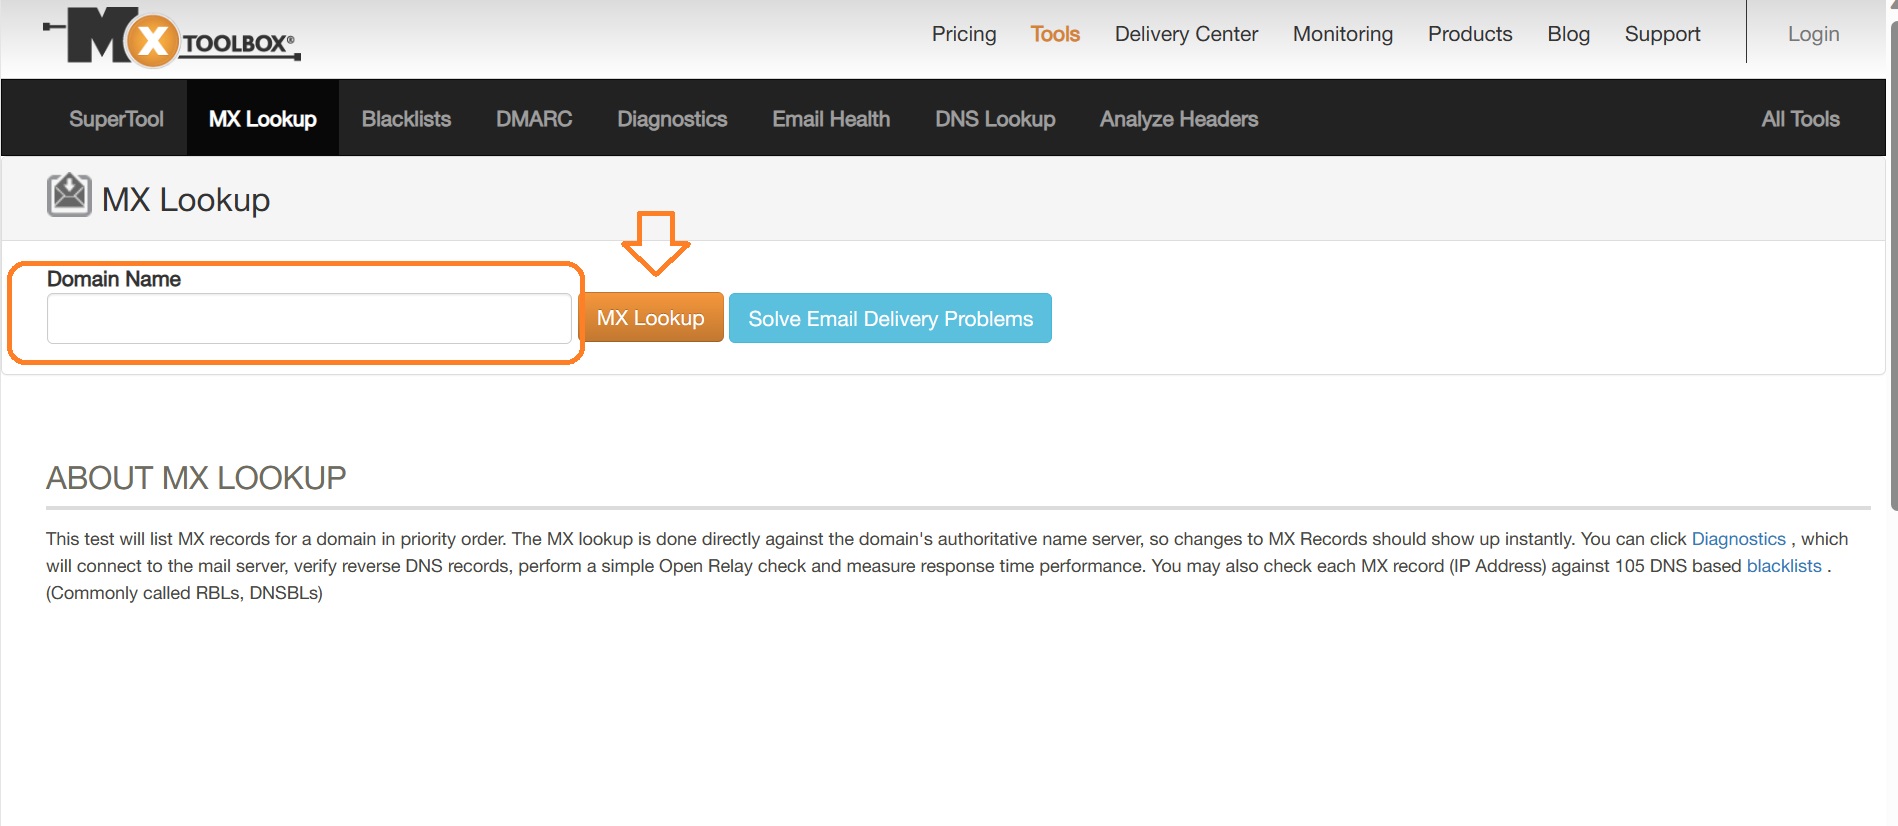
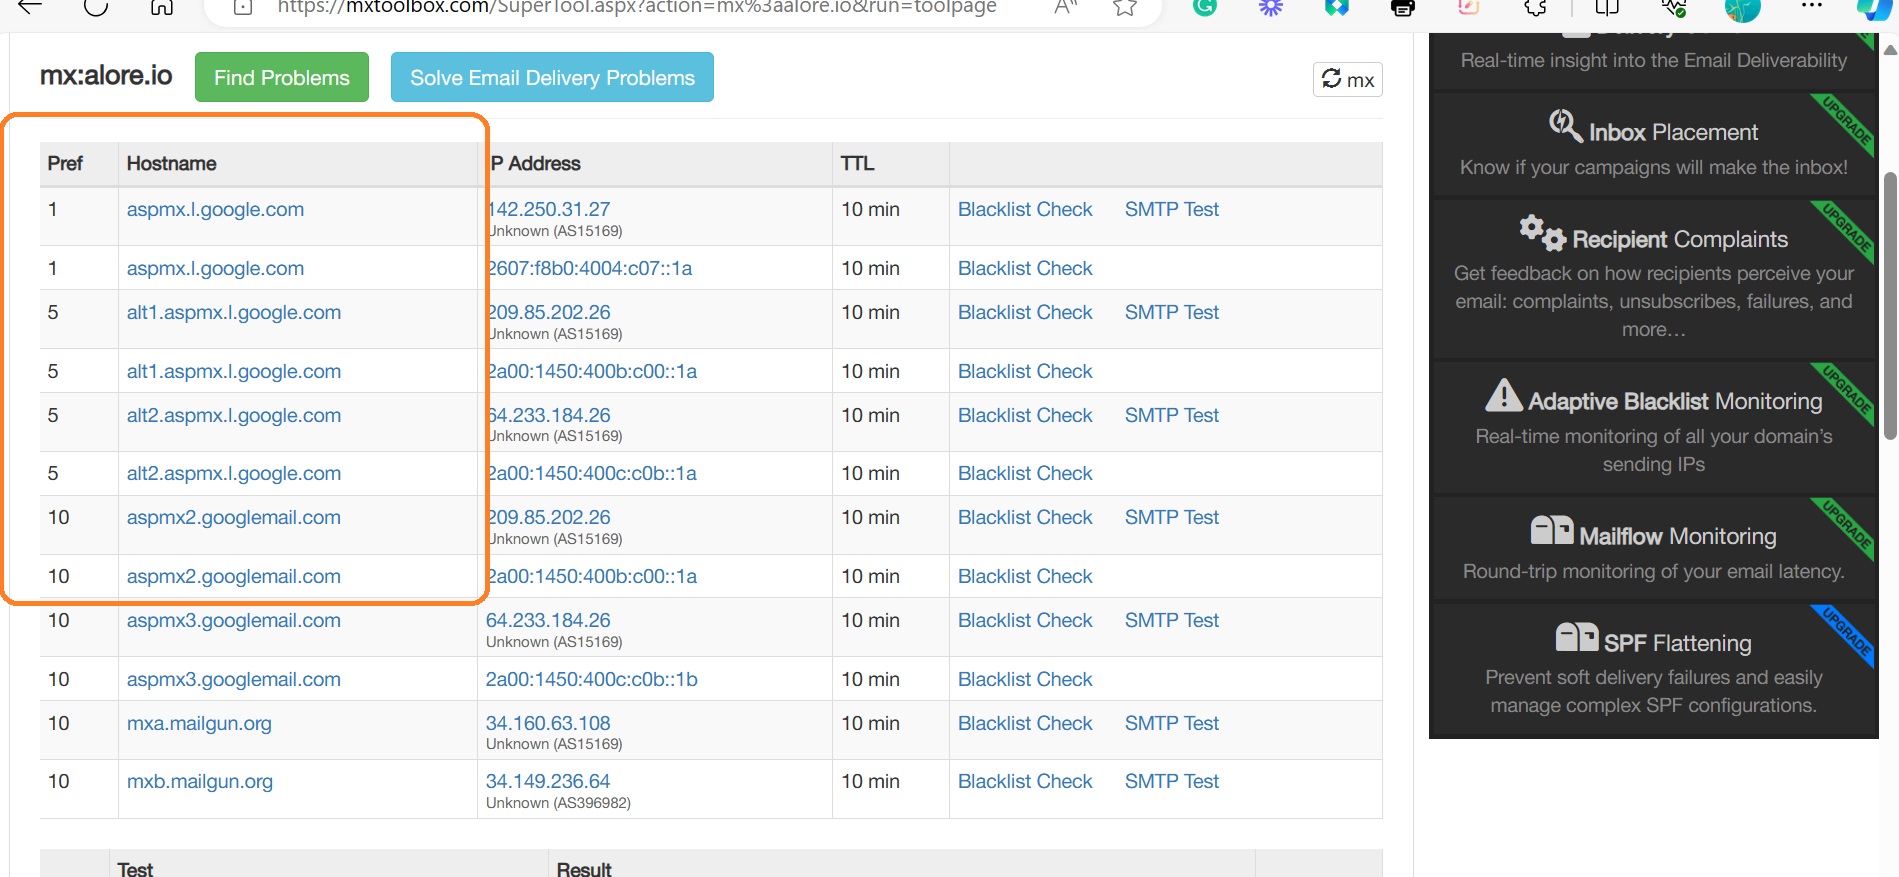
After adding the MX Records, it’s wise to verify that the setup is correct. Use an MX Lookup tool like "mxtoolbox" to check. Enter your domain, and the results should show your domain’s IP address pointing to Google servers.
Alternatively you can go to MX Lookup Tool - Check your DNS MX Records online - MxToolbox
Testing Email Functionality
Finally, send a test email to a user in your Google Workspace account. If the setup is correct, the user should receive the email without issues.
Next Steps
After setting up MX Records, the next step is configuring SPF Records. This is important for ensuring your emails do not end up in recipients' spam folders.
Conclusion
Setting up MX Records for Google Workspace on GoDaddy requires careful attention to detail, but by following these steps, you can ensure a smooth and successful setup. If you encounter any issues or have questions, it's advisable to seek help either through GoDaddy's support or Google Workspace forums.
Remember, accurate DNS configuration is crucial for the seamless operation of your email services. By taking the time to set up your MX Records correctly, you're laying a strong foundation for your organization's communication system.




.webp)
